A Step by Step guide to hanging a door
Hanging an internal door should be a simple task. If the door frame is already in place, and the frame is correctly aligned, then the door should hang straight and latch correctly. Unfortunately, it is easy to encounter problems when hanging an internal door. An uneven door frame, or incorrectly placed hinges, can make your door inclined to open or close by itself. It can also cause the latch to stick, making it hard to open and close the door.
Hanging a door correctly is not a particularly complex task, but it does require patience and a systematic approach. If you test the fit of the door at each stage and work slowly and methodically you should have no problems.
Tools Needed
You will need:
- Plane
- Sandpaper
- Screwdriver
- Drill
- Wedges
- Tape measure
- Pencil
- Spirit level
Time Required
You should be able to hang a door in an afternoon, but give yourself a full day to complete the process and any cleaning/painting/finishing work that is required.
Step by Step Instructions
- Start by measuring the door opening and the existing door, assuming that door fits the opening well. This will make it easier to choose a door that fits the opening correctly. Some doors can be trimmed or planed down to better fit your door opening, but not all doors allow a lot of trimming, so it is best to get the right size from the outset.
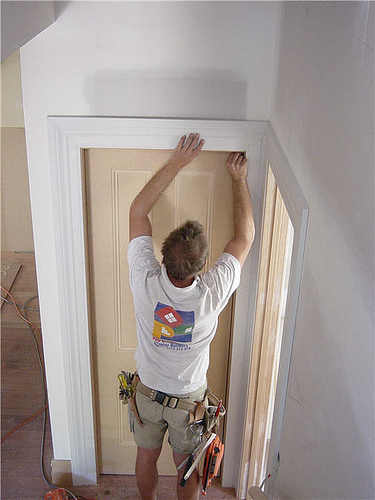
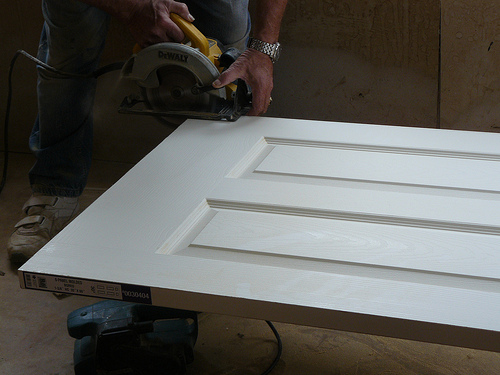
- Place the new door into the door frame to see if it fits properly. Your door should have a 2mm gap on the top, and on each side, and a gap at the bottom to suit the depth of your carpet. If necessary, use a plane to trim the door down, and then gently sand the door for an even finish. Be sure to test the floor and jambs to make sure everything is plumb.
- If the door frame is not square, then you have two choices. Some people like to buy door sets, which have a door already hung inside a frame. Replacing the entire frame and door is usually quicker than sanding and planing a door to fit an oddly shaped opening. Another option is to cut the door to fit, or use shims on the hinges to adjust how the frame sits in the door.
- Now it’s time to fix the hinges into the frame. If your existing hinges are in good condition and fit the frame well then you can skip this step and simply attach the door to those hinges. If you do need to replace the hinges, mark where the new ones need to go on the door frame, and chisel out a recess in the wood. Screw the new hinges in place with a single screw in the centre, so that the hinge knuckle sticks out slighting from the edge of the frame. hold the door in the frame, with wedges at the bottom to ensure that the gap at the bottom is correct. Mark the door where the top and bottom of the hinges should sit.
- Remove the hinges from the frame and place them on the edge of the door so that they line up with the pencil markings. Chisel out a small recess for the hinge flap, and screw the hinges into the door with a single screw per hinge. Make sure that the hinges lie flush into the door.
- Once again using wedges to support the door, screw the hinge flaps into the door frame. Check that the door swings freely and opens and closes comfortably. Once you are happy with the fit, screw in all of the remaining screws.
- If you need to fit a handle to the door, measure the distance between the existing keep and the floor, and mark the position where the latch needs to sit. Use this as guidance for where to install the handle. Fitting handles to the door is beyond the scope of this how-to guide. See our specific door handle fitting guide for more information on that subject.
Some Final Tips
Note that most moulded, real wood veneer, MDF and hollowcore doors have two hinges. Heavier feature doors and primed doors usually have three hinges. Make sure you use the right number of hinges so that the door hangs securely and moves smoothly and easily.

It helps to use an accurate spirit level when checking your door and frame. You can test whether a spirit level is accurate or not by laying it on a flat surface and noting the position of the bubble. Once the bubble has settled, flip the level over. If the bubble re-settles in exactly the same position, the level is accurate. If it does not, then the level is no good; swap it for one you can rely on.
If you are installing a door in a room that has not been carpeted yet, use wedges that are about 3/8th of an inch above the floor to support the door. This is an average depth for a carpet, and should be enough to save you from having to trim the door at a later date.
Conclusion
As you can see, hanging a door is not a particularly complex task. If you have a flat floor, then hanging a door should be an easy job. Most problems occur because the floor under the doorway is not level. If you don’t trim the jamb to compensate for the uneven floor, you can end up with your door latch being misaligned. This is why it is so important to check the floor and measure everything carefully.
Remember that you can always take the door out of the frame and trim more off it. You cannot put wood back onto the door if you remove too much. So, if you’re unsure what to do, err on the side of caution.
Photo credits:


